
Tahini oat cookies with carrot
Crispy and golden on the outside, chewy on the inside - and with a taste of all my favourite things!
These cookies are a mix of pretty much all of my favourite things. The result? My favourite cookies (chocker)! A bit more savoury than sweet, perfect to always have in the freezer for spontaneous fika-moments, or when you come home after a long day and want something to munch meanwhile you think about what to cook for your evening meal. In other words - these are really must-have-cookies!
Tahini oat cookies with carrot
Makes 12
Ingredients
4 dl rolled oats
1/2 tsp baking powder
1 Tbsp ground cinnamon
1/2 tsp ground cardamom
1/2 tsp pure vanilla powder
14 fresh dates, pitted
1 dl light tahini
2 Tbsp oat mylk or water
1 medium carrot
1 pinch flakey salt
How to
Pre heat the oven to 175°C. Mix oats, baking powder, spices and vanilla in a food processor. Add the dates and mix until crumbly. Add tahini and oat mylk, pulse until the dough starts fo get together. Add the carrot and mix until you get a dough. Form in to 12 balls, put on a baking tray and press lightly with a fork to get the look. Bake in the oven for 15-17 minutes, until they get crispy underneath and lightly golden on top. You want them to have a crispy outside and and chewy inside! Store in an airtight container, in the fridge or freezer.
Recipe was first published in The Gothenburg-Post/Två dagar

Sweet buckwheat granola with parsnip
With sweetness from fresh dates and parsnip this granola is a favourite of mine! Super crunchy and makes a great topping on yoghurt, porridge and smoothies - only to mention a few things!
I always have a batch of granola at home, I think it’s the perfect topping on yoghurt, smoothies and porridge - but also just as a snack! My granolas look different pretty much every time I make them as I tend to use what I find in my pantry at the specific time - both when it comes to flavouring, sweetening (if any) and the main ingredients in general!
This time I experimented and used parsnip as my sweetening (together with a couple of dates) - gives a really delicious flavour - try it for yourself!
Sweet buckwheat granola with parsnip
Yields about 1 liter
Ingredients
2 dl / 0.8 cups buckwheat groats (soaked over night or for at least 8 hours)
2 dl / 0.8 cups water
2 Tbsp cold pressed rapeseed oil
2-4 fresh dates (depending on how sweet you want it), pitted
1 tsp ground turmeric
1/2 tsp ground cardamom
2 dl / 0.8 cups steel cut oats *
4 dl / 1.6 cups mixed nuts/seeds of your choice
3 Tbsp chia seeds
2 parsnips
Add ins
2 dl / 0.8 cups mixed dried fruits/berries
1 dl / 0.4 cups coconut flakes
How to
Rinse the buckwheat thoroughly
Mix water, oil, dates and spices until smooth using a blender or an immersion blender. Chop the nuts is using any. Scrub the parsnips and finely grate them.
Pre heat the oven to 150°C fan / 300°F fan (if you don’t have a fan oven you can roast one tray at a time).
Mix all the ingredients in a big bowl using your hands, making sure it all gets covered in the date paste. Spread out on 2 baking trays. Roast in the oven until dry and crisp. Stir every now and then. Let cool and then add the dried fruits/berries + coconut.
Store in a glass jar with a lid. Stays well for weeks!
*In Swedish steel cut oats are “krossad havre”. If you cannot find steel cut oats/krossad havre you can use rolled oats/havregryn instead.
Recipe was first published in The Gothenburg-Post/Två dagar

Lentil cracker with seeds and rolled oats
Crispy crackers are a stapel in my kitchen. I like to have it with everything - from breakky to Friday snack! Preferably with some spread on top!
A staple which can vary in so many different ways! Depending on what seeds or nuts + flour I have at home my crackers always look different. This one though, with red lentils, have become one of my absolute favourites! Why? The lentils make the crackers if possible even more crisp - try for yourself!
My favourite way to serve them is with some kind of spread - you find a few of my favourites when scrolling though my recipes here on my website!
Lentil cracker with seeds and rolled oats
2 small trays
Ingredients
1 dl / 0.8 cups red lentils, soaked over night or for at least 8 hours
1 dl / 0.8 cups pepitas or pumpkin seeds
1 dl / 0.8 cups flaxseeds
1 dl / 0.8 cups rolled oats
1 dl / 0.8 cups oat flour
1 1/2 Tbsp chia seeds
1 1/2 Tbsp psyllium husk
1/2 tsp salt
2 dl water
2 Tbsp cold pressed rapeseed oil
How to
Soak the lentils, then rinse. Mix all the dry ingredients and the lentils in a bowl. Bring the water to a boil, pour over the dry mix together with the oil. Mix until a dough.
Divide the dough in two. Roll out, until very thin, between two pieces of parchment paper. Put on two baking trays. Let sit on the kitchen counter for at least 30 minutes.
Pre heat the oven to 150°C fan / 300°F fan. Bake the two trays in the oven for 30 minuter, carefully then turn the whole cracker thing around and bake for another 10 minutes, until dry and crisp. Let cool and indulge!!
Recipe was first published in The Gothenburg-Post/Två dagar

2 ingredient Apple compote
What to make of the lovely seasonal apples? 2 ingredient apple compote is one of my favourite things! And this is how to make it.
This time of year I have apples in most of the food I cook; grated in my morning porridge, mixed in to a creamy soup, dried in pieces for my granola, cut in half and baked until soft and sweet then serve with toasted seeds and a dollop of whipped coconut cream, cut in pieces and tossed together with root veggies….
AND cooked in to delicious natural sweetened apple compotes. It’s super easy to make and can be served with lentil stews, porridges, as a dessert with coconut cream and granola and lots more!!

2 ingredient Apple compote
Yields; depends on how much apples you get hold of!
Ingredients
Seasonal apples, of different kind and in different colors
ground ginger/cardamom/cinnamon
1 pinch of flakey salt
How to
Core the apples and cut them in to pieces. Put in a sauce pan and add water just enough to cover the bottom, but not covering all of the apples. Bring to a simmer and then gently simmer for 5-15 minutes (depending on how much apples you use), until the apples are soft. Mash the apples in to a compote using a fork. Add your choice of ginger/cardamom/cinnamon - or all of them! Salt to taste. Let cool. Put in an air tight glass jar.
The compote can be stored in an air tight glass jar for up to 5 days in the fridge. If you’re making a bigger batch you can put a bunch of filled glass jars in the fridge - and take out one every week! Also - it’s a great idea to freeze in portion sizes using ice cube molds - perfect to take out and put on your morning porridge!

Mamas turmeric and ginger super shot
A great way to boost your morning (or any part of your day). A blend of anti-inflammatory and antioxidant rich ingredients that makes your body - and tastebuds - cheer!
We all know that adding as much nutritious food to your day as possible is a great thing. And drinking a home juiced super tasty and refreshing elixir (kind of) is one of those things helping you get there!
As a person crazy about textures I prefer to eat my food instead of drinking. But if (when) you do find it hard to reach an high enough intake of fruits and veggies during a day (The Swedish National Food Agency recommends 500 g fruits and veggies per day. Preferably half of it being fruits and half of it veggies), we all have those days I’m sure, drinking a veggie shot can be a great way to add some of those grams.
A combination of eating whole veggies and fruits + drinking smoothies (where the whole ingredients are mixed) + drinking shots and veggie juices is a great way to make sure you get all the nutrients your body wants.
If you like to make your own shots and veggie juice I can highly recommend to invest in a slow juicer. What’s the deal with a slow juicer then? And what’s the difference from a more traditional centrifugal juicer? I’ve sorted it out - very briefly - below!
Both a slow juicer and a centrifugal juicer will give you nourishing juices, but a slow juicer is even more gentle to the things your juicing; furthermore using a slow juicer will keep even more of the nutrients + using it will give you the highest juice yield.
I’ve got a Witt slowjuicer and it’s brilliant! To be honest my mum is the most frequent user, she comes home to me every other week making shots for everyone i the family - and this is her favourite recipe! Enjoy!
Mamas turmeric and ginger super shot
Makes 1 bottle, about 750ml
Ingredients
50 g organic fresh turmeric
250 g organic fresh ginger
2 organic carrots
2 organic lemons
2 organic oranges
5 dl / 2 US cups water
1 pinch of freshly ground black pepper
How to
Peel the citrus fruits (I find the peel to be a bit too tough for the slow juicer). Cut everything in smaller pieces and put in your slow juicer or centrifugal juicer *.
Blend the golden juice with black pepper and water. Pour in a bottle and keep in the fridge, stays well for up to 7 days. Shake before serving.
Make sure to read the instructions on the manual before using it as different manufactures may have different recommendations on how use their products.


Sweet potato hummus with roasted garlic and tarragon
My favourite hummus in the world! Irresistibly creamy, sweet and kind of nutty - with a herby touch! Spread it on a seed cracker, add to your wrap or have it with a hearty salad.
Hummus, my favourite dip/spread/sauce/filling - or what ever you might call it! Except for the lovely texture and delicious flavour I really like hummus because of it's nutrition - it's a great way to add some extra protein (and fibers and vitamins and minerals!) to your plant based meal! Spread it on seed cracker, add to your wrap or have it with a hearty salad. Traditionally a hummus is made of chickpeas, but sometimes I use white beans instead - I really like the variation (food hack #1 in this post - look for easy made variations and cooking will be much more fun and simple!)!
Another way to vary your hummus is to add different veggies (like beetroot, roasted carrot, green peas, grilled bell pepper etc) and herbs - also a perfect way to match the hummus with what ever you're serving it with - or what you're craving at the moment!
In my book The new green salad I share three of my favourite hummus recipes - and one of them you find here below! It happen to be my favourite hummus in the world - irresistibly creamy, sweet and nutty at the same time - with a herby touch!
Photo by Fanny Hansson for The new green salad (Published by Bonnier Fakta)
Sweet potato hummus with roasted garlic and tarragon
Yield about 5 dl
Ingredients
240 grams (about 4 dl) cooked chickpeas *
1 small sweet potato, about 250 grams
1 garlic bulb **
2 tbsp tahini (preferably the light one, made of natural sesame seeds)
1/2 dl water
12 fresh tarragon leafs, or 1 tsp dried tarragon
2 tbsp cold pressed olive oil + extra to drizzle as garnish
Himalayan salt and freshly ground black pepper to taste.
Garnish
Sesame seeds
Chili flakes
How to
Pre heat the oven to 200 degres Celsius. Peel the potato and cut in to chunks, put on a baking sheet and mix with 1/2 tbsp olive oil. Remove the outer skin from the garlic bulb, enough for you to see the garlic cloves (skin on) separately with but yet you want the whole bulb to stick together. Brush with 1/2 tbsp olive oil. Put next to the sweet potatoes and roast in the oven for 30 minutes until potatoes and garlic are soft. Let cool.
Mix water and tahini until creamy using an immersion blender or food processor. Add the rest of the ingredients (squeeze out the garlic), except for the olive oil and tarragon, mix until creamy. Add 1 tbsp olive oil and tarragon and mix to combine. Salt and pepper to taste. Drizzle with oil and sprinkle with sesame seeds and chili flakes before serving.
Tip! Make a big batch and store in a air tight container in your fridge! Then you'll be ready for snackning, brunching, dining or having guest at any time. Food hack #2 in this post. A staple in my home! Lasts up to about a week.
* Either use canned ones, or by dried and soak/cook yourself! If so, make sure to cook a big batch and put the ones you're not using for the recipe in different sized portions in your freezer! Takes about 2 seconds to take out when ever you want to use chickpeas the next time! Food hack #3 in this post)
* * YES, a whole (!) garlic bulb! After half an hour roasting in the oven it will be all soft and sweet with an almost caramelised kind of flavour. It's lovely!

Red rice salad with yellow beets, Jerusalem artichoke and butternut squash patties
Ever wondered what you would do with the fiber "leftovers" after juicing vegetables? Veggie patties! Make big burger-size ones, or smaller patties - perfect for salads!
Red rice salad with baked yellow beets, Jerusalem artichoke and butternut squash patties
4 portions
Ingredients
2 dl red rice, uncooked
400 grams yellow beets
200 grams Jerusalem artichoke
100 grams red cabbage, shredded
1 handful of fresh parsley, chopped
70 grams mixed salad leaves
1 tbsp cold pressed olive oil
salt and pepper
Butternut squash patties
5 dl butternut squash or pumpkin fibers *
4 dl/320 grams cooked chickpeas
1/2 sorghum flour (you can also use oat flour/quinoa flour/buckwheat flour)
1 dl fresh herbs of your choice (I used parsley + basil), or 2 tbsp fresh frozen
1 dl pepitas
Topping
Turmeric toasted cashews **
Cress
How to
Pre heat the oven to 200 degrees Celsius.
Cook the rice according to the instructions on the packaging.
Mix the pepitas coarsely. Mix the ingredients for the pumpkin patties to a smooth batter using a immersion blender or a food processor. For in to patties, turn around in the pepitas. Put on a baking sheet and bake in the oven for about 15 minutes, until patties are firm and the pepita coating get lightly golden. If you want a really crisp coating you can fry the patties for about 1 minute on each side after baking in the oven.
Peel all the yellow beets except for one. Cut in to chunks. Slice the last yellow beet thinly using a mandoline, or a sharp knife. Wash and scrub the Jerusalem artichoke very well, making sure no dirt is left. Slice thinly. Put beets and artichokes on a baking sheet, drizzle with oil and roast in the oven for about 20 minutes, until beets are tender, and artichokes are soft with crispy skin.
Mix all the ingredients for the salad, serve with the patties. Top with cashews and cress. Preferably serve the salad with a creamy spread
* With "fibers" I mean what you get left after juicing vegetables, for example butternut squash if you're making my Butternut squash chia pudding. If you don't have any "pure" vegetable fibers you can also use puré of whichever veggie you want (pumpkin/carrots/beets). If so you might have to add som more flour to get the patties to stick together.
** Toast 1 dl cashews tossed with a splash of cold pressed olive oil, a pinch of sea salt and two (or three) pinches of ground turmeric for about 10 minutes in the oven at 175 degrees Celsius.

Favourite cracker spreads
Some people would say they are the answer to a lot of things. Make a big batch and keep some for upcoming breakfasts, lunches, afternoon snack moments and dinners!
Seed cracker is one of my big obsessions. It's a staple in my kitchen and I make a batch every other week to make sure I always have some at home. I like them with a creamy avocado and sprouts for breakfast, as a side to a hearty salad or delicious soup, as a nibble during a party or just as they are. Nutty, crispy and yummy. No matter when they are served a creamy spread goes very well with them. And creamy spreads is just what this blog post is about.
These two are easy to make, contains lots of nutrition and flavour AND can be stored in the fridge for quite a few days. Make a big batch and keep some for upcoming breakfasts, lunches, afternoon snack moments and dinners. Except from having the spreads on a crispy cracker they could also be served to a hearty salad or in your favourite wrap.
* The cracker above is "Oat and walnut cracker" from my cookbook The new green salad.
Pea and cilantro hummus
250 grams green peas
2 tbsp tahini (I prefer the light one here, made of raw sesame seeds instead of toasted)
1/2 dl water
1 big handful of fresh cilantro
1/2 dl cold pressed olive oil
salt and pepper to taste
fresh or dried cilantro for garnishing
Carrot and tarragon hummus
4 dl/320 grams cooked chickpeas
250 grams cooked/steamed/baked carrots
2 tbsp tahini (I prefer the light one here, made of raw sesame seeds instead of toasted)
1/2 dl water
1 small garlic clove, minced
1 tsp dried tarragon
2 tbsp cold pressed olive oil
salt and pepper to taste
sesame seeds + cold pressed olive oil for garnishing
How to
Green pea and cilantro hummus: Mix water and tahini until creamy using an immersion blender or food processor. Add the rest of the ingredients and mix until creamy. Salt and pepper to taste. Sprinkle with cilantro before serving.
Carrot and tarragon hummus: Mix water and tahini until creamy using an immersion blender or food processor. Add the rest of the ingredients, except for the olive oil, and mix until creamy. Add the oil and mix to combine. Salt and pepper to taste. Drizzle with oil and sprinkle with sesame seeds before serving.
DONE!

Almond and apricot bliss balls with wintery spices
Sweet, tangy and chunky at the same time. These are my favourite seasonal bliss balls, with a lovely flavour of my favourite home made wintery spice blend. Serve as a sweet treat during brunch, afternoon snack or "fika"!
Sweet, tangy and chunky at the same time. This is my favourite seasonal bliss balls which I make with toasted almonds, dried organic apricots and all my favourite wintery spices. Make a big batch and store in the freezer - ready to be taken out and served whenever during the upcoming season!
I make my own "wintery spices blend" that I use both for bliss balls like these but also in hot and cold porridge and hot drinks throughout the season. Try making your own (or use my "recipe" below), using your favourite spices, or by blends like "ginger bread spices" found in the grocery store.
Almond and apricot bliss balls with wintery spices
Makes about 14 bliss balls
Ingredients
2 dl almonds (preferably toasted for extra flavour)
1 dl oats (use gluten free if gluten intolerant)
1 dl shredded coconut
12 dried organic apricots
2 tbsp cold pressed coconut oil
2 tbsp freshly pressed orange juice (optional)
1-2 tbsp almond milk or water (optional)
1 tsp ground cinnamon
1/2 tsp ground ginger
1/2 tsp ground cardamon
1 pinch ground cloves
1 pinch sea salt
How to
Pulse almonds, oats, shredded coconut and spices until coarsely chopped * in a food processor. Add the apricots and mix until crumbly, then add the coconut oil and orange juice and mix just until the mixture sticks together. You might have to add a bit of almond milk or water (especially if not using orange juice. This usually depends on how big/soft the apricot are) to get it to stick together. You want to mixture to be slightly sticky.
Form mixture in to balls and roll in shredded coconut. Place in the fridge and served slightly chilled - thats how I like them best!
* I like having quite big bites of almonds in my bliss balls! You could also mix until a flour like mixture before adding your wet ingredients, this will give your bliss balls another consistency.

Red quinoa and roasted red cabbage salad with butternut squash, apple and herb baked falafels
My favourite way to cook red cabbage - cut in to big chunks and baked in the oven until soft but tender, and crispy!
To bake big chunks of red cabbage in the oven until soft but tender is my favourite way to cook red cabbage. In this salad I toss the cabbage around with some quinoa, small bites of butternut squash, thinly sliced apple and herby falafels!
I roll my falafels in sesame seeds and bake them all at the same time at a baking sheet in the oven. Makes them really crisp but still healthy! You could serve this salad with an avocado dressing or any nut dressing that you like, but I actually prefer to just drizzle a really good cold pressed olive oil over the whole thing.
Roasted red cabbage salad with butternut squash, apple and herb baked falafels
Serves 4
Ingredients
1 medium red cabbage
1 small butternut squash
2 dl red quinoa, uncooked
1 apple
100 grams mixed salad leaves
Baked herb falafels
450 grams pre cooked white beans (2 packages or 8 dl)
1 dl sunflower seeds (preferably toasted)
2 dl fresh herbs of your choice
1 dl sorghum flour (quinoa-/buckwheat-/oat flour works just at fine)
1/2 tsp himalayan salt
2 tbsp cold pressed olive oil
2 pinches freshly ground black pepper
1 dl sesame seeds for coating
How to
Pre heat the oven to 200 degrees. Mix white beans, sunflower seeds, herbs, flour, oil, salt and pepper until a sticky and semi smooth "batter" - you want to keep the texture from the sunflower seeds! Ad a bit of water if to dry, and a bit more flour if to wet. Let sit for 20 minutes, this helps the falafels stay together even better when rolling/baking/eating. Form in to falafel, about 20 pieces, and roll in sesame seeds. Place on a oiled baking sheet and bake in the oven for 15-20 minutes, until crispy on the outside.
Remove the stalk bit from the cabbage and cut the rest in to big chunks. Brush with oil and place on a baking tray.
Peel (start with removing the ends, then cut the squash in half lengthwise, and then in half on the width. Carefully cut of the peel using a sharp knife), scrape out seeds and stringy bits and cube butternut squash Drizzle with oil and place beside the cabbage. Bake in the oven until both cabbage and squash gets soft and golden around the edges, takes about 20-25 minutes.
Cook the quinoa according to instructions on the packaging.
Thinly slice the apple using a mandoline, or a sharp knife.
Mix cabbage, squash, quinoa, apple and salad leaves. Serve with herb falafels and drizzle with your favourite cold pressed oil!
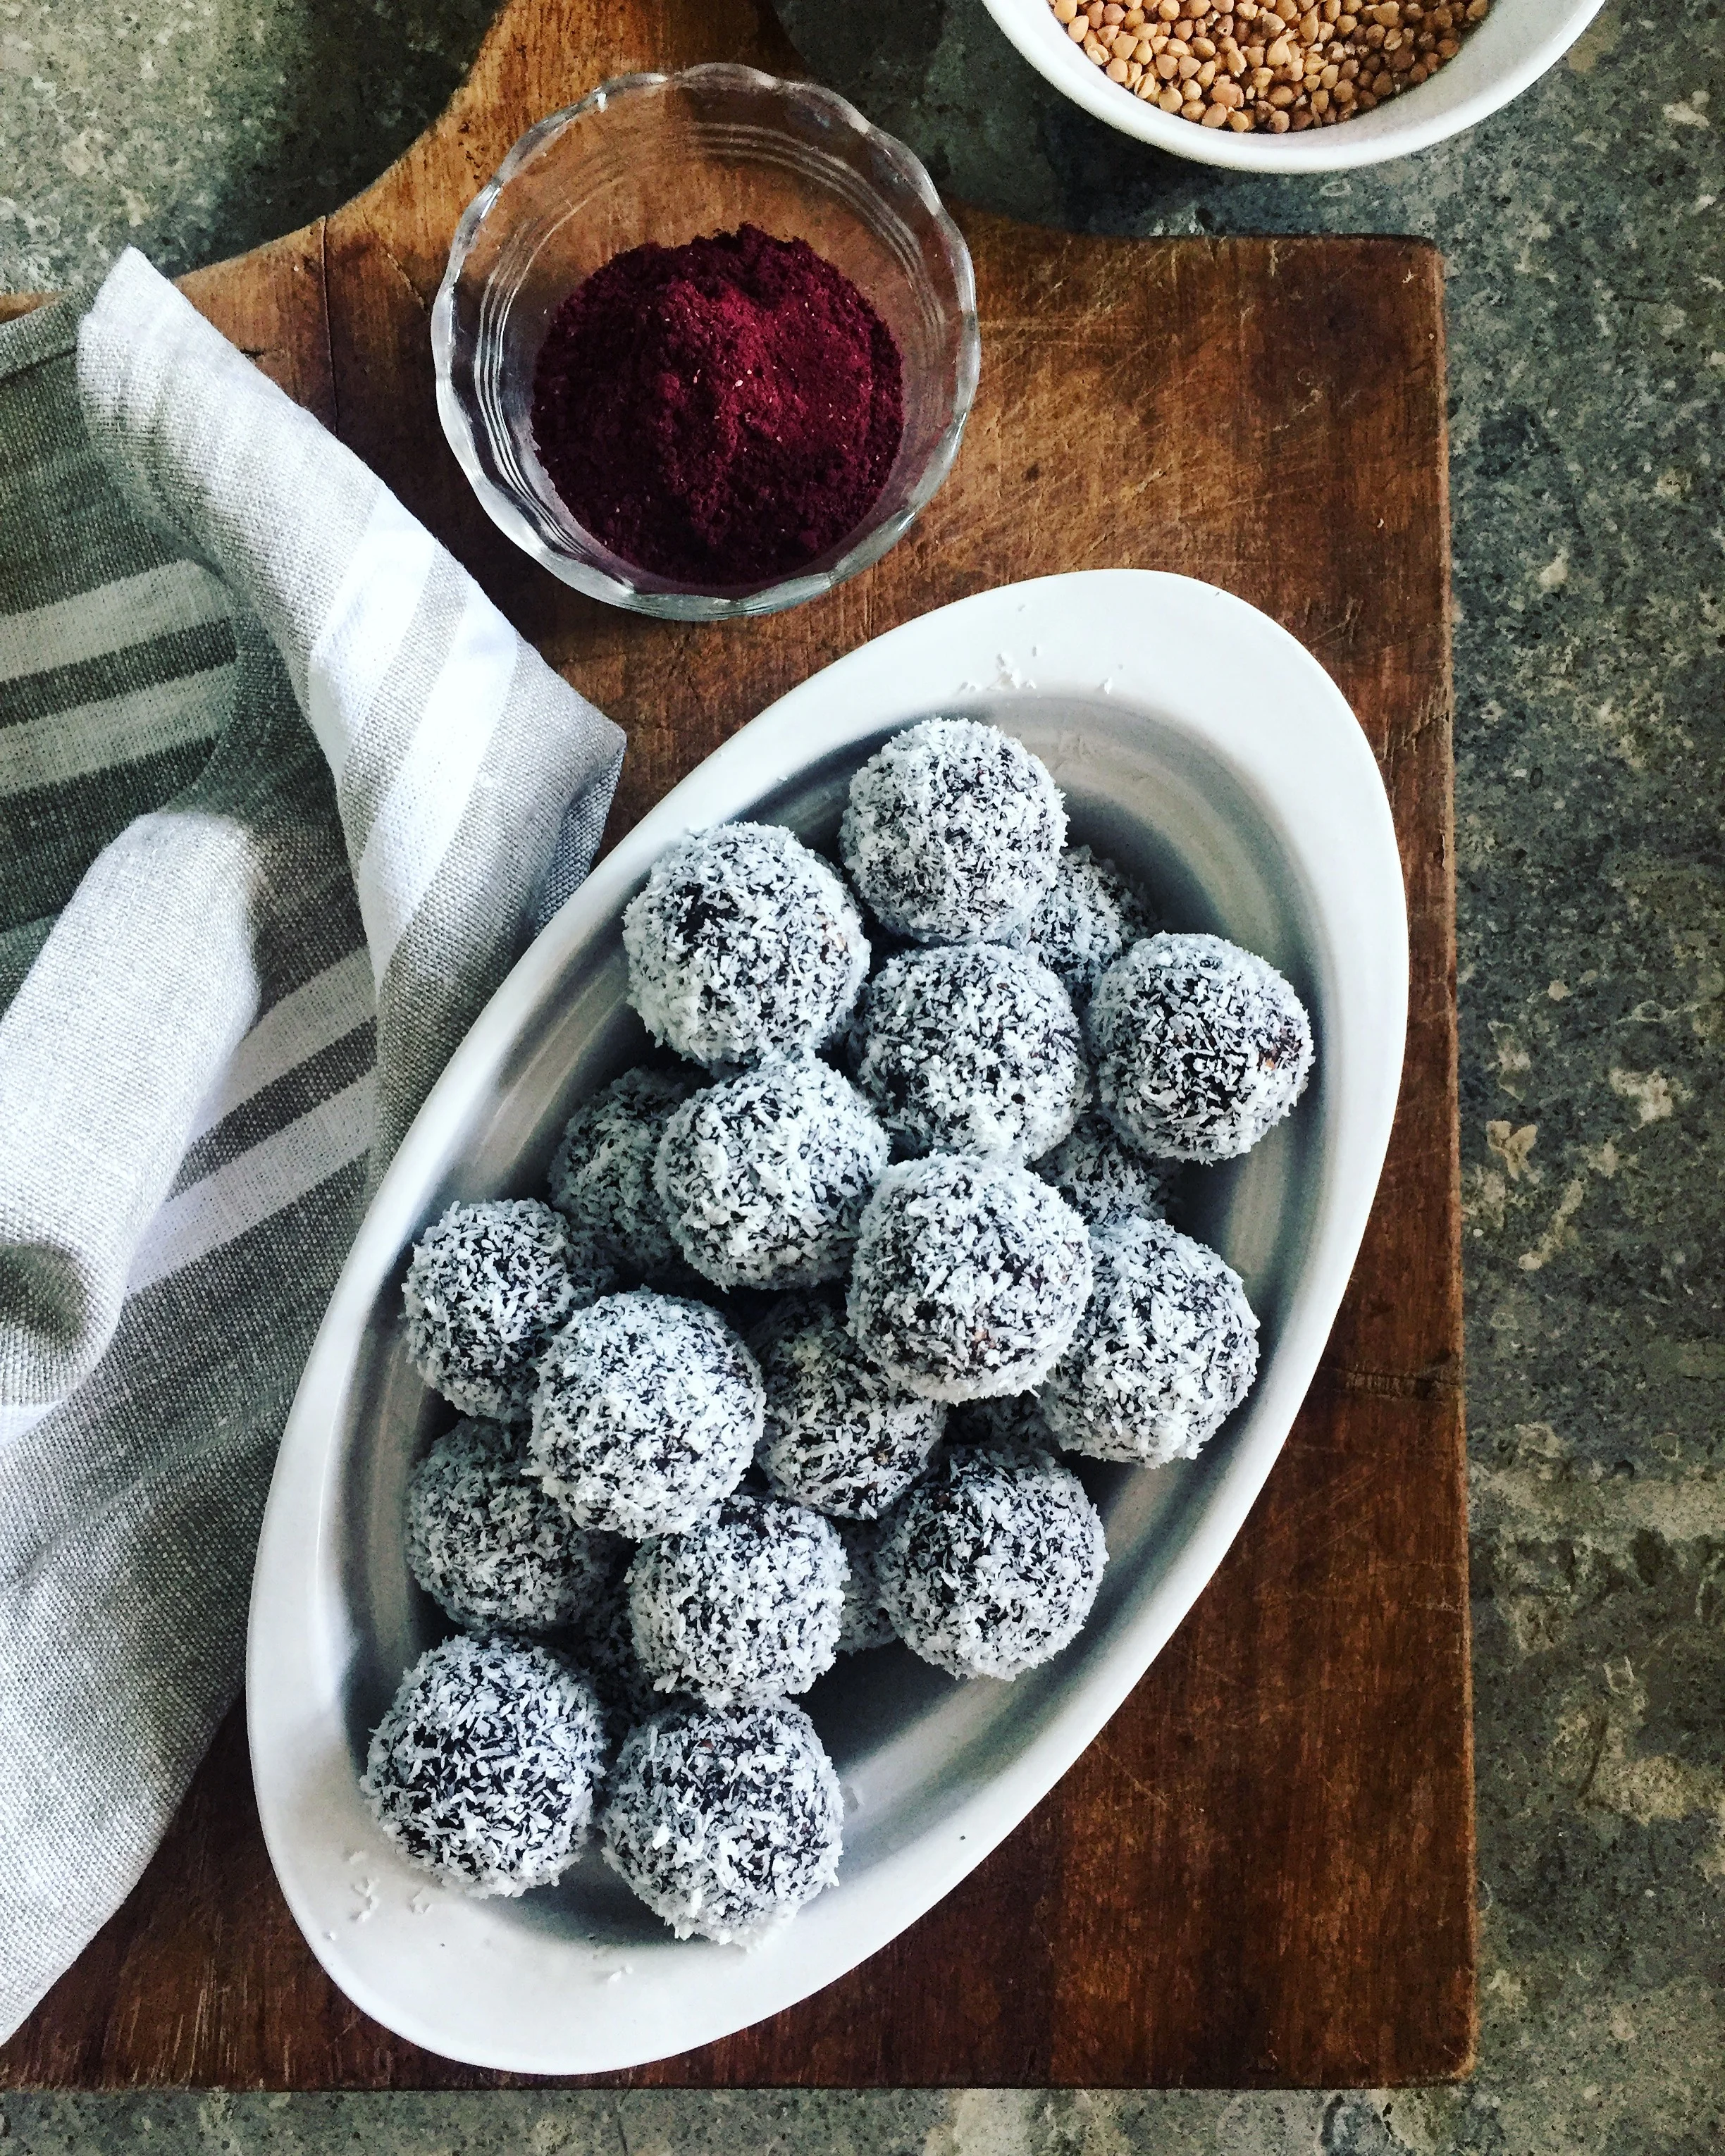
Buckwheat chocolate bliss balls with blueberry and coconut
The chocolate together with the blueberry is a really tasty combination. And the tiny bit of sea salt that I always add makes all the difference.
I really love almonds, nuts and seeds. As a snack, on top of a salad, on my morning porridge, mixed to a nut butter and in raw desserts. Nuts contain LOTS of greats nutrition, and they also contain a lot of fat. Good fat, but still, even good things can be to much. Therefore I like to sometimes use toasted buckwheat whenever I make raw desserts or bliss balls for afternoon snack. Buckwheat groats contains lots of great nutrition, but less fat then nuts and seeds. And also - the toasted buckwheat gives a delicious crunchy texture, and it's gluten free.
So, I came up with a simple recipe for a perfect and delicious little ball with buckwheat instead of the commonly used nuts or seeds. This buckwheat bliss ball is the perfect “fika” but also a great afternoon snack. I made them the other day, during one of the retreats here in France this summer - and everybody loved them. The chocolate together with the blueberry is a really tasty combination. And the tiny bit of sea salt that I always add makes all the difference.
A few things to have in mind is: add more cacao for an even more chocolaty flavor, add more blueberry power for even more of a berry taste, and more dates for a sweeter touch. Mix it until you make it - so to speak!
Enough writing. So, here is the recipe for these little ones, hope you like them!
Buckwheat chocolate bliss balls with blueberry
Makes about 20 bliss balls
Ingredients
2 1/2 dl dried whole buckwheat groats (buy toasted ones if you find in your store, then you kan skip the first instruction below on how to toast them yourself)
3/4 dl cacao
2 tbsp blueberry powder
A pinch of flakey salt
10 fresh dates, pitted
2 tbsp cold pressed coconut oil
1-2 tbsp water
Shredded coconut for rolling
How to
Put the buckwheat in a fine mesh strainer. Bring some water to a boil and then pour over the buckwheat. Rinse with cold water and let drain for a few minutes. Toast in a dry pan, on medium heat, until golden and crisp. Let cool.
Mix buckwheat, cacao and blueberry power until some of the buckwheat has been crushed. I like my bliss balls to have quite a few whole buckwheat groats left as I like the crunchy consistency, but you can also mix until a flour like consistency. Add dates, coconut oil and water, mix until a dough. You might want to add a bit more water to get the dough to stick together.
Form the dough in to about 20 balls, roll in shredded coconut. Put on a plate and let chill in the fridge for at least 30 minites before serving. Allowing time in the fridge (or freezer if you cannot wait to dig in!) will make them even more firm and - if you ask me - even tastier!

White bean dip with mushrooms and herb pesto
A simple white bean dip, topped with some pan fried mushrooms, a delicious yet simple pesto and a handful of mâche lettuce for some extra freshness.
Sometimes simplicity is what makes a dish (big or small) really good. Like with this recipe. A simple white bean dip, topped with some pan fried mushrooms, a delicious yet simple pesto and a handful of mâche lettuce for some extra freshness. Together with some seed crackers or crisp bread from my cookbook The new green salad this is really YUMMY!
I would serve this as a starter, as a side to any dinner or as a great part of a weekend brunch with family and friends! Or, as I will do later today, as a light evening snack. You can also make a big batch and store some of it in the fridge, then you have the perfect spread to your breakfast crisp bread or filling for a hearty wrap sorted out for the next couple of days.
Photo by dear Fanny Hansson.
White bean dip with mushrooms and herb pesto
Serves 2 two as a starter/snack, or 4 as a side
Ingredients
230 g cooked giant white beans (about 4 dl cooked)
2 tbsp tahini
1/2 dl water
1/2 cold pressed olive oil
a small handful of fresh tarragon
250 grams mushrooms of your choice (preferably chanterelles when they're in season!)
70 grams mâche lettuce
flakey salt and freshly ground black pepper
Herb pesto
1 1/2 dl cold pressed olive oil
1 small garlic clove, minced
2 dl mixed fresh herbs
1 tbsp freshly squeezed lemon juice
flakey salt and freshly ground black pepper
To serve
seed crackers or oat crisp bread (recipe in my book The new green salad)
cabbage (really nice to cut in pieces, similar to the size of a cracker) or endive
How to
Soak and cook the white beans according to instructions on the packaning (PLAN & PREP. Make a big batch if you're in the making and keep some of it in the fridge for salads, dips or soups fillings during the next few days. Or even put them in the freezer, in small bags, for other occasions through out the next weeks). If using pre cooked beans rinse them well. Mix tahini and water in a food processor until smooth and fluffy. And the white beans and mix until smooth. Add the oil, lemon juice and tarragon. Mix until completely smooth. Salt and pepper to taste.
Brush and cut the mushrooms in quarters. Drizzle some oil in a frying pan and fry the mushrooms on medium heat until soft and lightly golden.
Mix all the ingredients for the herb pesto in a food processor or immersion blender. Add more oil for a runnier texture. Salt and pepper to taste.
Put the white bean dip in a bowl, top with mushrooms, drizzle some herb pesto and top with a handful of mâche. Serve with some seed crackers, cabbage or endive!

Carrot patties with ginger, herbs and drizzled lemon tahini dressing
The perfect party finger food, satisfying topping on a salad or filling in a wrap
These little delicious bites are easy to make, filled with nutrition and are really easy to make. They make the perfect finger food for the party, can be served as a satisfying topping on a salad or filling in a wrap. Try flavouring the patties with any herbs you prefer, I used cilantro and parsley is it was the ones I hade on my windowsill. Plus I really like them.
The tahini dressing that I drizzle over right before serving is a twist on one of the favourites from my book The new green salad, and it goes very well with the ginger and cilantro. I've made these patties vegan by using a "chia egg" (which is really 1 part chia seeds + 3 parts hot water, mixed and soaked it takes a texture similar to regular egg), if you prefer to use regular egg a medium one would be just enough.
These carrot patties will for sure be one of the staples in my fridge this summer. Make a double (or why not triple!) batch, keep some in the fridge and some in the freezer. That will make you settled for a couple of weeks! Hope you like them!
Photo by Fanny Hansson.
Carrot patties with ginger, herbs and drizzled lemon tahini dressing
Makes about 20 small patties
Ingredients
7 dl finely grated carrots (about 5 medium carrots)
2 stalks spring onion
2 tsp grated fresh ginger
a big handfull of fresh cilantro
a big handfull of fresh parsley
2 dl rolled oats (gluten free if gluten intolerant)
2 tbsp cold pressed olive oil
1 tbsp chia seeds + 3 tbsp hot water
2 pinches mineral salt
Lemon tahini dressing
1/2 dl light or regular tahini *
zest + freshly squeezed juice from 1 lemon (more to taste)
1/2 a garlic clove
1/2 - 1 dl water (depending on how thick you want it)
mineral salt
How to
Preheat the oven to 200 degrees Celsius. Peel and finely grate the carrots. Thinly slice the spring onions. Scrape away the peel from the ginger using a spoon, then finely grate it. Roughly chop the fresh herbs.
Put the chia seeds in a small mixing bowl. Bring 1/2 dl water to a boil (don't let it boil for to long as that will make the water evaporate, you only need to make sure the water is hot), pour over the chia seeds, stir and let sit for about 5 minutes until the mixture takes on a jelly like consistency.
Place carrots, spring onion, ginger and herbs in a mixing bowl. Add oats, olive oil, chia egg and salt. Stir well to combine. Let sit on the kitchen counter for at least 20 minutes to allow the mixture to set, this is important for the patties to hold together - and for getting the lovely texture!
Form the mixture in to about 20 small patties and put on a baking sheet. Bake in the middle oven the oven for about 15-20 minutes, until patties are firm and edges are a bit crispy.
Lemon tahini dressing: Mix together all the ingredients until a creamy dressing. Salt to taste.
Serve patties with the lemon tahini dressing and fresh herbs!
* There are also the dark tahini, made of roasted sesame seeds. I prefer the lighter one, made of plain sesame seeds, as it has a rounder and more gentle taste to it.
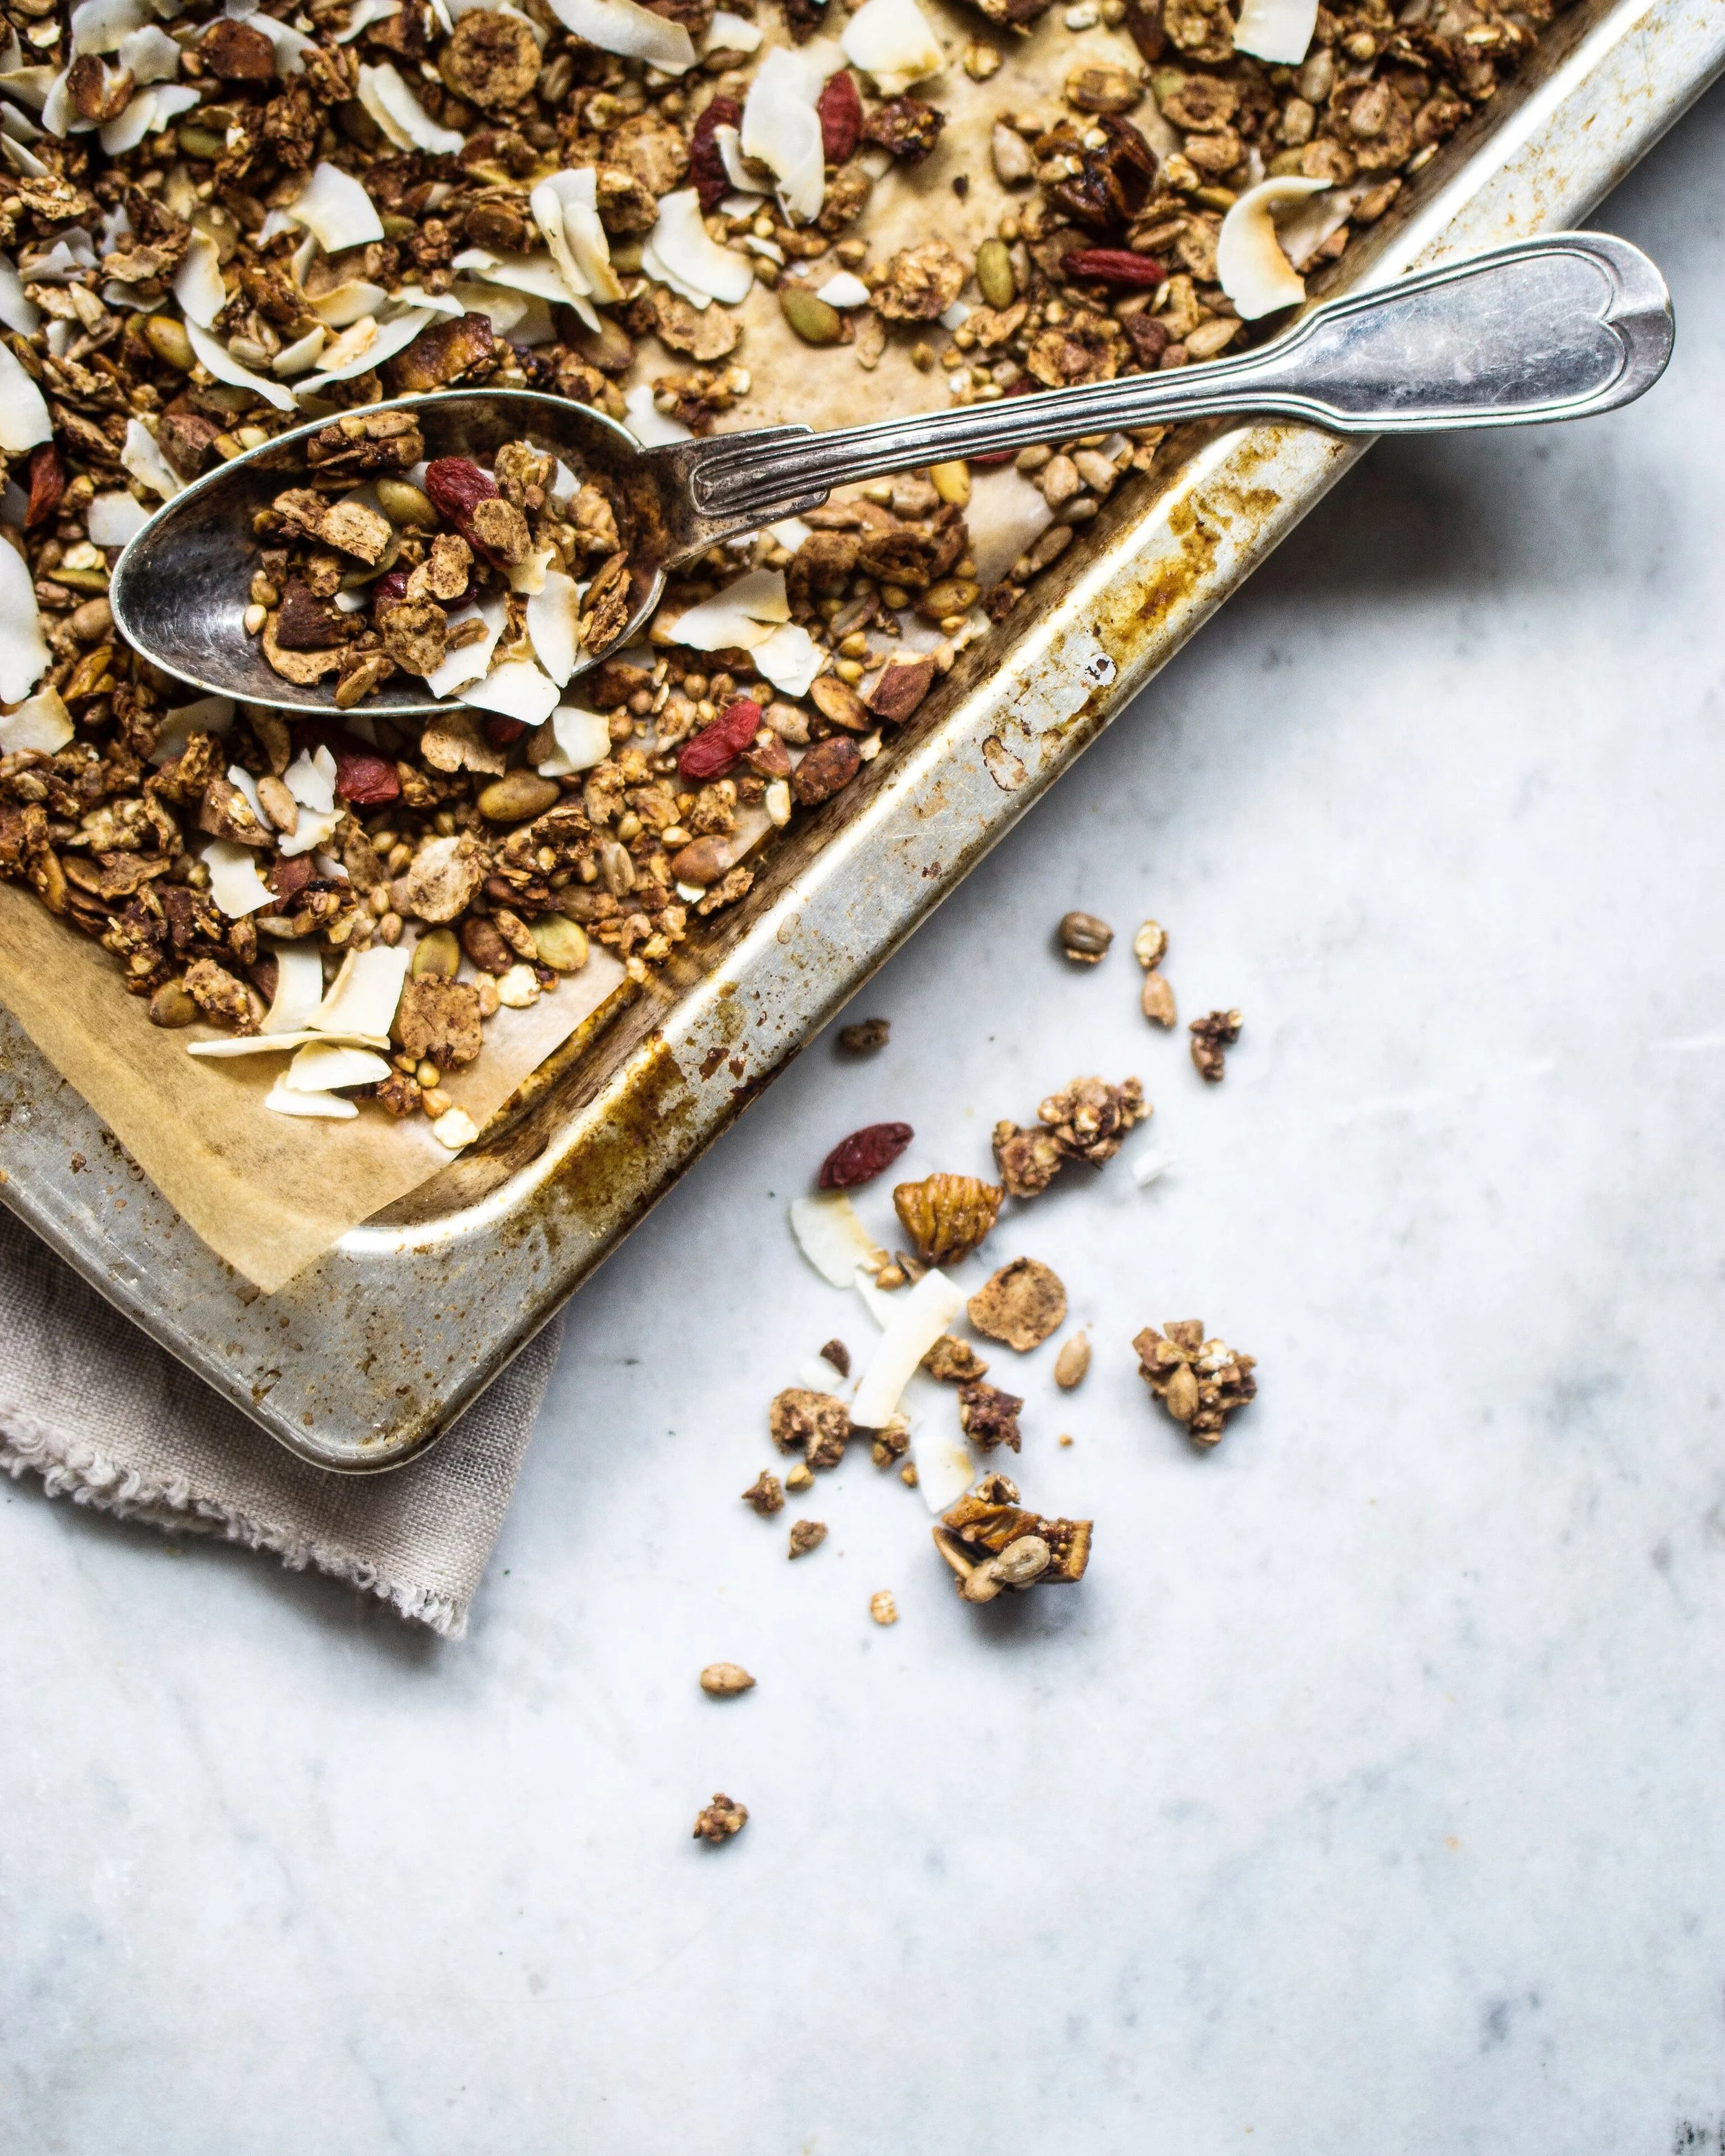
Sweet date granola
Crunchy granola sweetened with fresh dates. Filled with nutrition, taste and warming spices. A staple in my kitchen that works as topping on both sweet and savory dishes.
Crunchy granola sweetened with fresh dates. Filled with nutrition, taste and warming spices. This is a super simple and smart recipe - just use the grains/nuts/dried fruits you have at home. Add nuts if you love nuts, don't if you allergic. Use raisins if that's your favorite, use mango if you want a tropical touch. Well, you know what I mean - mix and match to get you absolute favorite granola!
Sweet date granola
1 big batch, about 1 liter
4 dl rolled oats
4 dl seeds/nuts/grains
2 tbsp cinnamon
2 tbsp cardamom
1 tsp pure vanilla powder
1 good pinch Himalayan salt
1 dl water
2 tbsp extra virgin olive oil
3 fresh dates, pitted
1 dl toasted coconut flakes
1 dl dried fruits (raisins/blueberries/gojiberries)
How to
Preheat the oven to 175 degrees Celsius. Mix rolled oats, seeds/nuts/grains (I used a mix of chopped almonds, pumpkin seeds, sunflower seeds, buckwheat groats, tiger nuts), cinnamon, cardamom, pure vanilla powder and a good pinch of Himalayan salt in a mixing bowl.
Bring water and dates to a boil. Let simmer for 1 minute. Mix until completely smooth using a hand blender. Add to the mixing bowl and mix everything together using a wooden spoon until every bit gets covered. Spread out on a baking sheet and toast in the oven until crispy and golden, stirring every now and then, for about 30 minutes.
Let cool. Add 1 dl toasted coconut flakes + your choice of dried berries/fruits (I used goji berries + figs). ENJOY on your breakfast porridge, smoothie bowl, chia pudding or just as a snack!
Store in an airtight glass jar, preferably on your kitchen counter as it looks so pretty.


Vivamus pellentesque vitae neque at vestibulum. Donec efficitur mollis dui vel pharetra.